Quantcast
Channel: Italian Needlework
Viewing all 99 articles
Browse latest View live

Needlework Contest - Florence

$
0
0
UPDATE: Originally I had erroneously posted that the exhibition would be held at the Palazzo Davanzati when, in fact it will not be. The venue for the exhibition will be the Palazzo Borghese in Florence, located 600 metres away (Google says a 7 minute walk) from the Palazzo Davanzati.


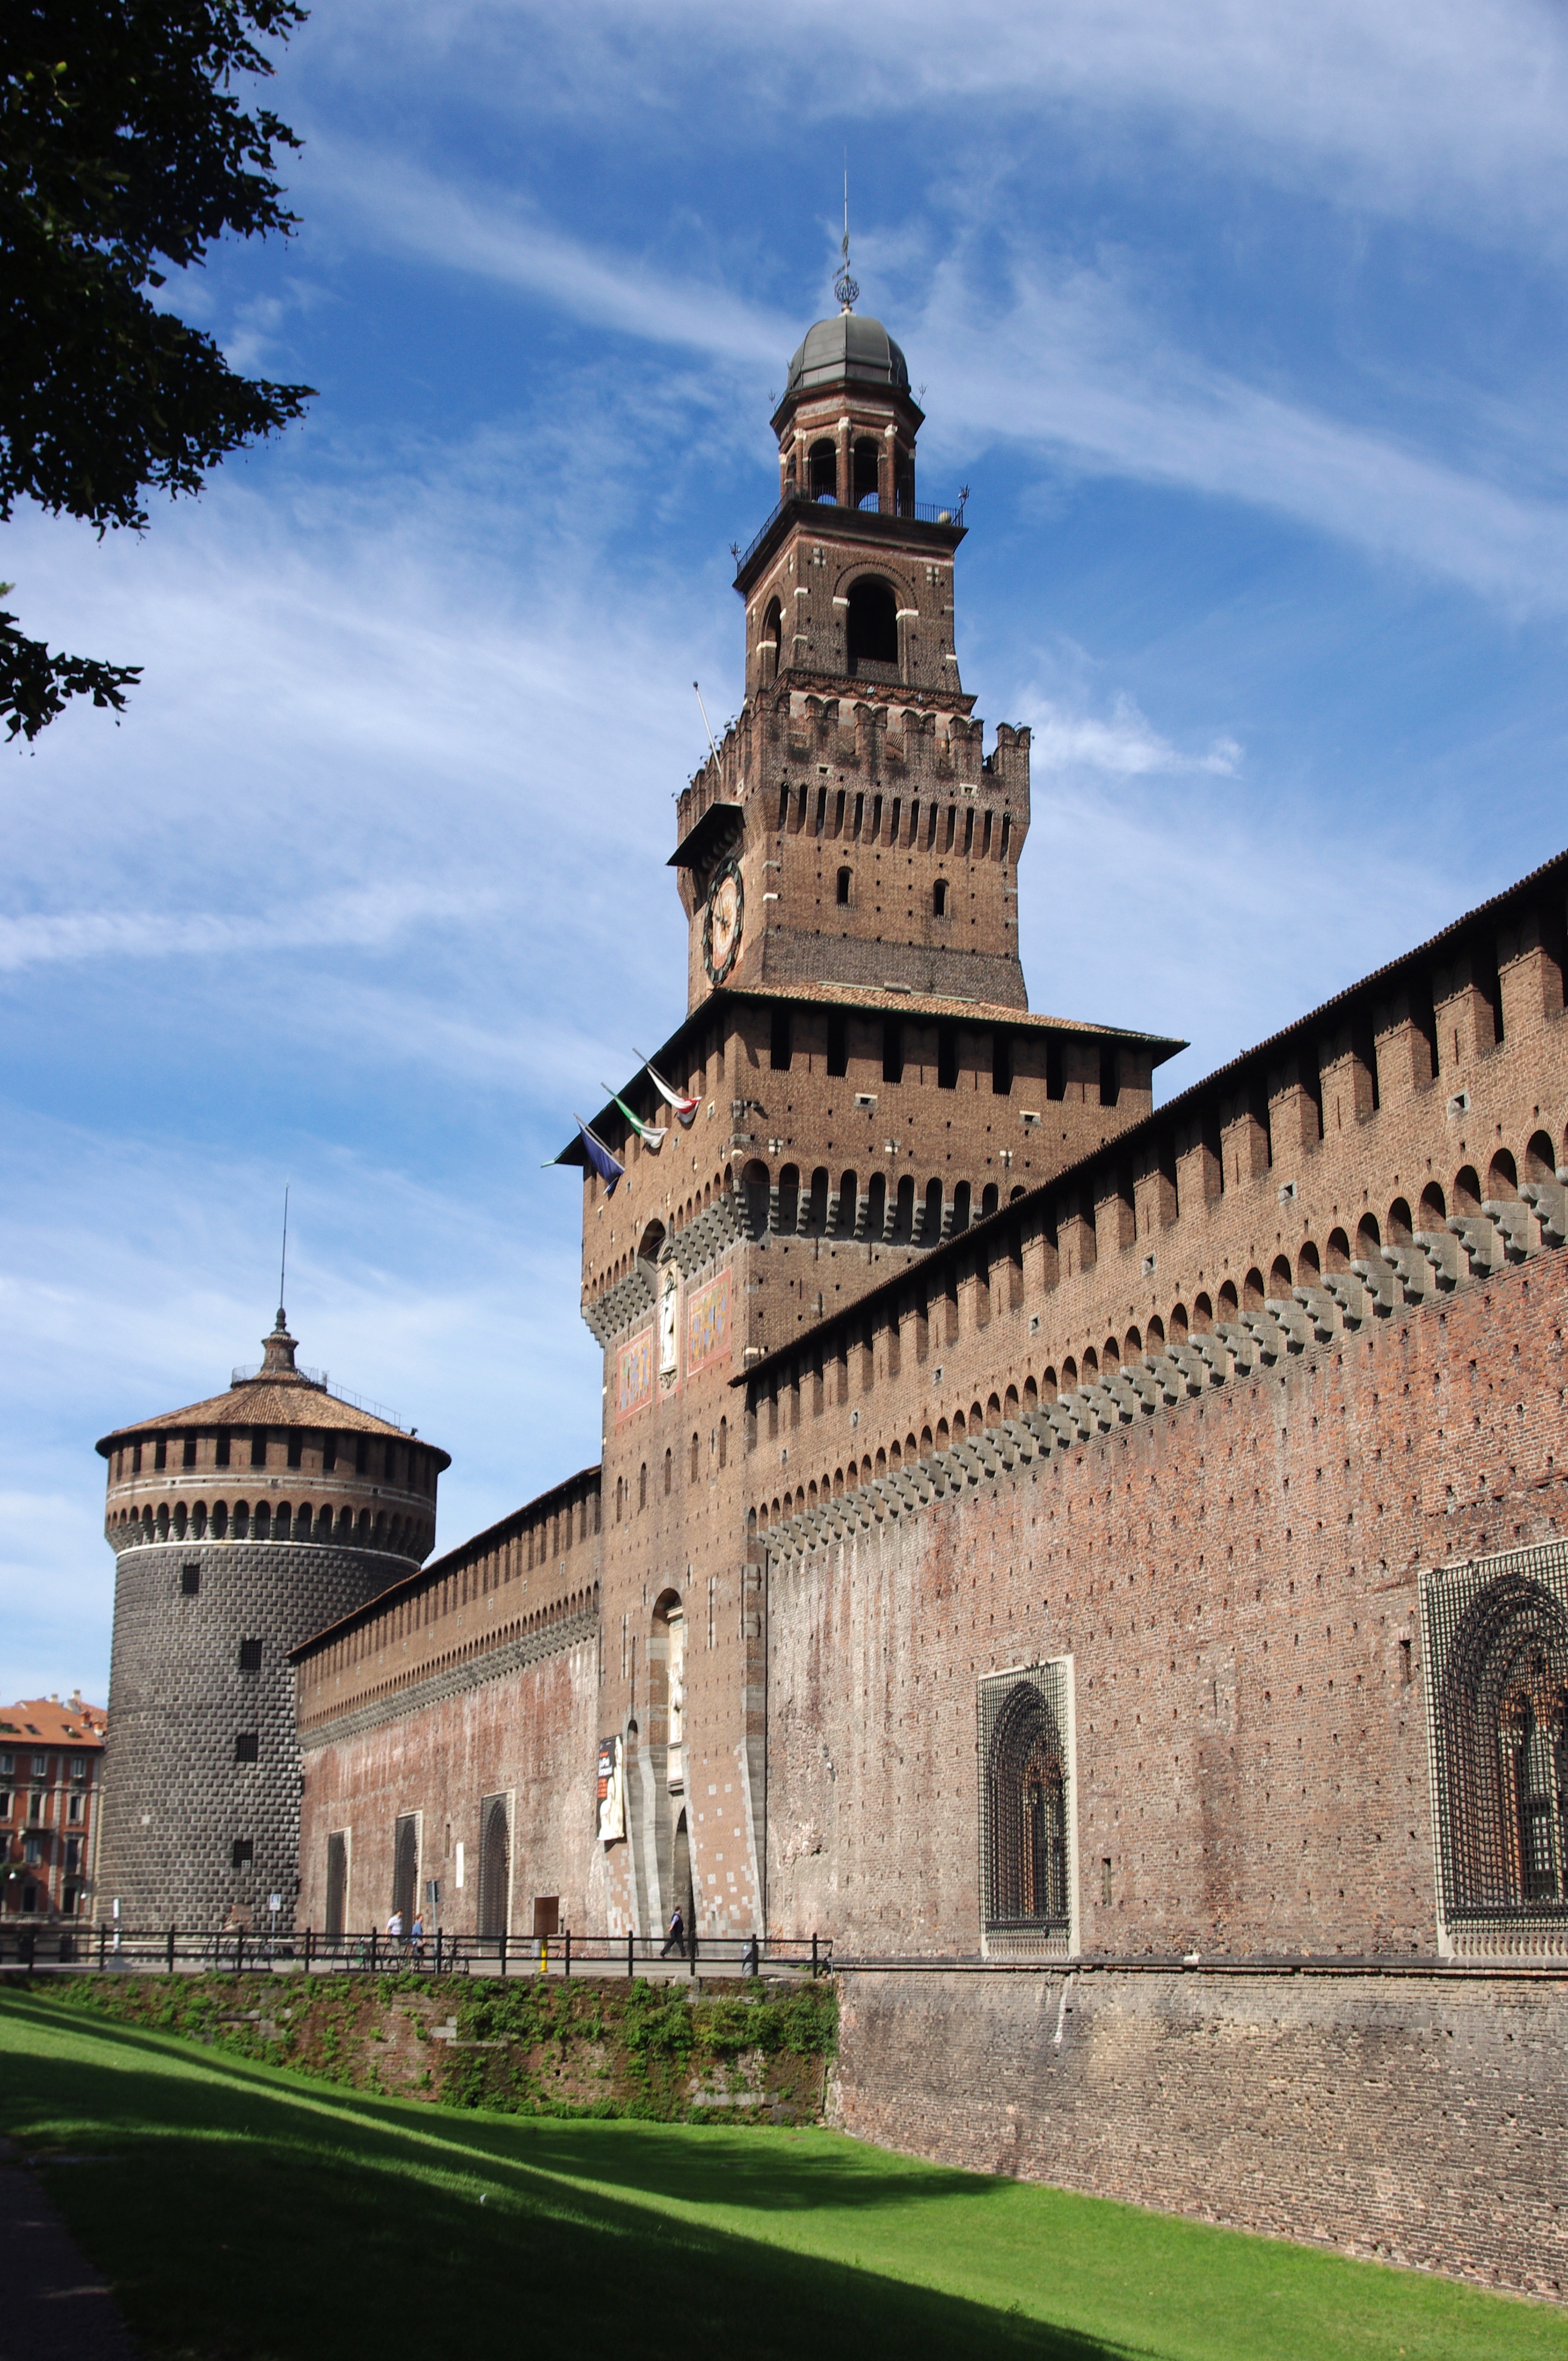
The Club del Punto in Croce is organizing an International Textile Art Exhibition called "The Chatelaine de Vergy" to be held at the Palazzo Borghese, at No. 110 Via Ghibellina in Florence November 9 - 30th, 2013.

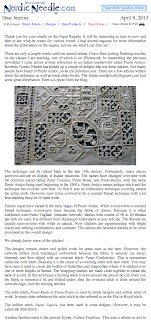
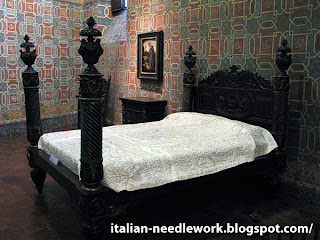
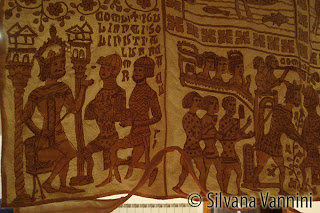
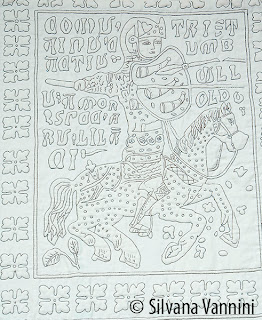
The theme of this exhibition is the story of The Chatelaine de Vergy, a 13th century French chivalric romance which inspired the frescos done in one of the bedrooms of the Palazzo Davanzati (picture above), which is a different palazzo in Florence.

Palazzo Borghese in Florence. Image from Wikipedia.

For reasons of space availability and hours of operation, the exhibition will be held at the Palazzo Borghese in Via Ghibellina which lies 600 metres away from the Palazzo Davanzati.

You can read an English version of this tale by downloading a free pdf file here. The original tale was written in French and translated into Italian and if you search for images with the terms: "La Castellana di Vergy" you can see some of the frescos from the Palazzo Davanzati.


The exhibition will be comprised of the textile works of all those who wish to enter a piece of work inspired by the frescos and/or furnishings of the Palazzo Davanzati.

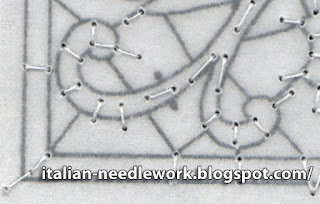
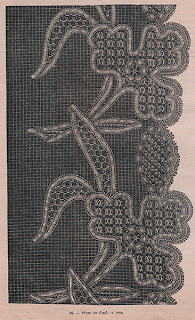
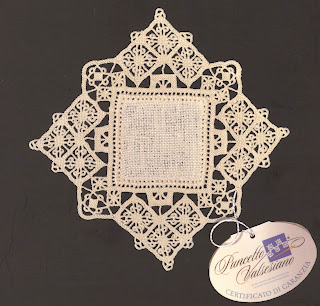
Art, history, cultural research and dexterity are the ingredients of this exhibition and the Club del Punto in Croce hopes this will bring about fascinating creations of embroidery, lace, macramé, quilting and other textile arts to be admired by multitudes of enthusiasts and others who are interested in the ancient handicraft techniques for which Florence has been particularly known worldwide for centuries.

I have translated the rules for entry here below:

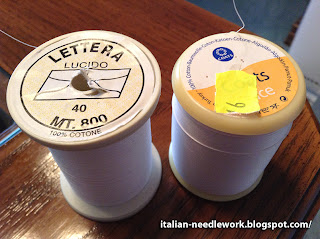
  • Open to all techniques related to the needle and thread, used alone or in mixed media.
  • All forms of all kinds are accepted with dimensions not to exceed 150 cm x 100 cm.
  • For quilted works, you will need to construct a support system so the back may be seen (pocket, pole, hook or other) to aid in the exhibition which must be sent along with the work.
  • For the purposes of setup, each participant is required to submit the dimensions (which can be approximate) of their finished work by the 31st of May, 2013.
  • A professional photograph of each work should be emailed to:
    info@ilclubdelpuntoincroce.com
    or mailed to:
    Il Club del Punto in Croce
    c/o Guida
    via Jacopo Nardi, 60
    50132 Firenze, Italia
    by the 30th of June, 2013 so as to allow the jury time to make selections for the exhibition and the catalogue.
  • The creators of the works selected will then be invited to send in their pieces. A pre-paid return envelope is required, works will be returned between December 2013 and January 2014).


Books are available at the Palazzo Davanzati with reproductions of the rooms of the Museum for source material. The Museum is open from Tuesday to Saturday from 8:15am to 1:50pm. The Museum is also open the first, third and fifth Sunday of the month and the second and fourth Monday of the month.

For complete information, contact the Club del Punto in Croce:
www.ilclubdelpuntoincroce.com
info@ilclubdelpuntoincroce.com
tel. 055/2478204

I think this will be a fantastic show, please let me know if you enter or go to see it!


Aemilia Ars Needle Lace - thread used for support stitches

$
0
0

Many times when we are interested in learning a new needlework technique, we go about gathering the "right" supplies. I know for me, when I want to start something, I get a lot of the enjoyment from the hunt for materials.

I have only dabbled in Aemilia Ars needle lace, a quick 3-hour class back in 2007 and some experiments on my own at home. Nothing I want to show anyone! From reading Italian books on how to execute this beautiful form of needle lace, I saw that they used something called "Refe" no. 40 for the support stitches. That is, the stitches which are placed on the cardboard support to hook on to when building a piece of lace.

I have never been successful in obtaining a spool of this mysterious "Refe" no. 40 so I've always just used cotton sewing machine thread. It is quite annoying as the sharp needle used to execute the actual lace always pierces the support stitches making it quite the task to separate the lace from the cardstock support. There are always endless little fibres from the support stitches to be extracted from the lace.

Here is what I mean by support stitches, I can't show you the whole design as it is about to be published in the May/June Lace Issue of Piecework.


I learned that the "Refe" no. 40 is not terribly easy to find in Italy either as it has been discontinued. The ladies are now using a new thread called Coats Glace no. 40. I immediately set about finding myself a spool (in the interests of research, you understand). I couldn't find it anywhere around here (North America) so I wrote to the Coats UK website asking where I might get some locally. While we wait on their reply, you can see what it looks like and read about its particular qualities at the Coats UK website. Keep in mind, we are talking about the Ticket no. 40 thread weight.

Meanwhile, I found Coats Glace for sale at TomboloDisegni in Italy (look under: Negozio, Filati, Cotone, Filati Vari), so I ordered a spool (among other things) and when it arrived I used it for the support stitches in the photo shown above. I always test my translations to see if my English makes any sense, so after I had translated the instructions for this piece, I started to see if I could execute the lace.

What I noticed right away was that I no longer split the support stitches with my needle when executing the lace stitches. Fantastic! If I ever finish the lace, it will be easily removed from the cardstock and support stitches.

Conclusion: the Coats Glace no. 40 thread is worth the investment as it will save lots of time and frustration in the long run.

Now, because I am who I am, I still wanted to see the "Refe" no. 40 thread and some kind ladies in Bologna send me a partial spool of it. The first thing I noticed is that the label doesn't have "Refe" on it anywhere! No wonder I couldn't ever source a place online to buy it! No matter! It was called "Lettera Lucido" and put out by Coats Cucirini which is the Italian division of Coats.


Comparing the two threads, the Glace is ever-so-slightly thicker and has 100 metres more thread on the spool but otherwise has the same stiffness to it, which is because of the way it is made. I can't get the price tag off the Glace thread without removing the paper below so I've left it there so you can see through it (underneath it says: Coats Glace, made in Turkey).

If I ever hear back from Coats about a North American source, I'll let you know!

Aemilia Ars Needle Lace - New Book!

$
0
0


Nothing lifts the spirits bogged down by winter doldrums like a new needlework book! Pictured above is the third and latest publication in the Quaderni di Aemilia Ars series. This time the ladies of the Associazione Culturale "I Merletti di Antonilla Cantelli" tackle fruit!

Classic Fruits is the title and in addition to pomegranates and grapes there are acorns, sheafs of grain and all the appropriate foliage to help you create nine exquisite projects of various sizes and difficulty.

There are detailed instructions with the support stitches visible and though the text is only in Italian, if you've been experimenting already, you should be able to follow along. If this is your first foray into Aemilia Ars Needle Lace, there are diagrams and close-up fotos to help you figure things out if you don't speak Italian.

Sample page. Copyright Nuova S1.

This soft-cover book is a healthy 80 pages made up mostly of close-up photos, something I really like! I really want to be able to count the stitches in an example when I'm doubting whether I've done something correctly. I never have any idea of how many stitches should be filling an area and I'm always afraid to make my own guess, so this really helps me become a little more comfortable when learning something new.

I have translated a few paragraphs from the introduction:

The acorn, pomegranate, grapes and sheafs of grain are recurring motifs in our lace. Not all are fruits in the true meaning of the word, but we believe in the understanding of the reader for this and other inaccuracies.
[...]
We have indicated these fruits as classics for their presence in many contexts (traditions, history, legends, sacred texts, designs, heraldry) and their various symbolic meanings more often changing over time and from place to place, they themselves have changed. 
[...]
Among the many possible executions of each motif, in the technique Aemilia Ars, we have made a particular choice, dictated primarily by simplicity. The pictures indicate the orientation of the piece during execution.
[...]
The drawings were done in pencil. We are not interfering with the result: we wanted to maintain that undeniable charm that the lines have – a bit faded and certainly always irregular. Everything is now in the hands of those who will make and give their own interpretation.

If you've already seen the two previous books in this series: Fiori [Flowers] and Bordi [Borders], then you know that this will be a rare and valuable addition to your library. If you're in Europe, you can order directly from the publisher, Nuova S1 and pay by bank transfer. If you are overseas, you can pay with PayPal from Tombolo Disegni (send an email request to order).

Look for the May/June 2013 issue of Piecework for another great project in Aemilia Ars Needle Lace!

The literary works of Rosita Levi Pisetzky

$
0
0

If I had some extra money to spend, I would hunt down a series of encyclopedias on the History of Costumes in Italy [Storia del costume in Italia] published between 1964 and 1969 by Treccani, written by Rosita Levi Pisetzky. There are, I believe, five volumes which are broken down as follows:

Volume I: The history of costume after the fall of the Western Empire
Volume II: The fourteenth and fifteenth centuries
Volume III: The sixteenth and seventeenth centuries
Volume IV: The eighteenth century
Volume V: The nineteenth century

Every once in awhile a complete collection comes up for sale on ebay like this leather-bound edition:


In the Burlington Magazine Vol. 112, No. 807, June 1970 there is an enthusiastic and extensive review (in English) of the encyclopedia set by E. H. Ramsden.

While I can't get my hands on this body of work, I did find another book by Rosita Levi Pisetzky called Il Costume e La Moda nella Società Italiana [Costume and Fashion in Italian Society], 1978 Giulio Einaudi Editore.


It totals 383 pages and includes a detailed index. The book is divided into two sections, Le forme della moda [The Shapes of Fashion] and Il costume nella storia [Costume in History]. Each section is then further divided into subsections covering periods from Roman times up to 1900.

I like that it is specifically about Italy and Italian fashion and clothing and it makes me want the series of encyclopedias I mentioned above all the more.

In the single volume that I have is a middle section of mostly black and white photos of statues and painted works of mostly Italian examples of clothing and accessories throughout the period covered by the text.

It is full of interesting topics like the symbolism of colour, the origins and names of fabrics and particular attention is paid to accessories. Very useful for those who are recreating period costumes.

I have been completely unsuccessful at finding out anything about the author herself. On the back cover flap of the book that I have it says: She devoted constant attention and passion to the problems of the history of fashion and costume in her Milan and Italy. Among her numerous works are: La Storia del Costume in Italia, Il Gusto Barocco nell'Abbigliamento, Storia del Fazzoletto, Come vestivano i Milanesi. [...] She died in 1985.

I also accessed an online edition of a magazine called "Quaderni grigionitaliani", Volume 16, 1946-47, which has a five poems by Rosita Levi Pisetzky. The footnote after her name says she was an italian refugee and passed many years in Roverado di Mesolcina (Switzerland?) and that she had already contributed poems and tales to the magazine. A quick search of the database however produced no results for her name at all, not even the one in Volume 16.

I'm thinking that her name suggests she may have been Jewish and if she was from Milan, she will have had to flee during WWII but I will have to do more research as this is only a theory. I would love to know the story of her life and what led her to produce this amazing body of work on Italian fashion and costume. If you know anything further I'd love to hear from you!


Rosita Levi Pisetzky

$
0
0

It's funny how the mind works. For months I've been searching for biographical information on Rosita Levi Pisetzky always turning up empty. I finally decided to post what I had, believing that I couldn't find out any more without visiting some Italian archives, perhaps in Milan.

I received a comment from a reader this morning that said she had spoken with a descendant of Rosita Levi Pisetzky about 10 years ago on the phone in Milan. Sitting down at my computer after work today, I suddenly decided on a different set of search words and bam! I finally discovered something. Not searching in the field of textiles at all, but searching in the history of Milan.

On the website Storia di Milano, the death (in Milan) of Rosita Levi Pisetzky is listed as an event on the 18th of January, 1985. Inputting the event sentence as written on the Storia di Milano website into Google produced a link to the bookseller Maremagnum which had a rather informed bit of information on the author of the encyclopedia set that I told you about yesterday including her birthdate of 1898. This means she published the history of costume in Italy encyclopedia set when she was about 66 years old... and the book that I have, Il costume e la moda nella società italiana when she was 80!

Further searches brought me to the source of this information on Google Books which comes from an entry in the Dizionario della Moda [Dictionary of Fashion] by Guido Vergani, 2010. Here is a translation:

Levi Pisetzky, Rosita (1898-1985) Clothing historian. An intellectual from the Milanese upper-middle class, she was defined as "The Lady of Italian Costume" by Guido Lopez in an article written after her death in 1985. A self-taught historian with a life passed in studying archives, literary texts and iconographic sources, she published the most important treatises on the history of costume in Italy. Her first studies came out between 1937 and '38 in various women's magazines and journals. The articles on the history of the lace of that period remain notable for their careful research.
Between 1954 and '62 she wrote about the history of costume in the various epochs for the "History of Milan" published by Treccani in 16 volumes. These studies were expanded and then printed in a work of five volumes edited by the Italian Editorial Institute under the title "Storia del costume in Italia" between 1964 and '68. In 1978 Einaudi published "Il costume e la moda nella società italiana", further development and updating of her historical research. She was the first to treat the subject in a serious way, studying dress as a means of communication and social document. 
In her later years, she donated her own specialized library to the Collection of Bertarelli Prints of Milan, and her collection of vintage clothes to the Civic Collections of Applied Art of Milan, both located in the Castello Sforzesco, where they are still accessible today.
After her death, her wardrobe was donated by her family to the Bertarelli. It is an interesting collection of tailored garments of Milanese manufacture from the 1950s and '60s.
-- Virginia Hill 

Now isn't that a treasure trove of leads to follow up? I've been to the Castello Sforzesco in Milan too, and obviously didn't understand what I was looking at or missed it completely! I'll have to go back!

Castello Sforzesco in Milan. Image from Wikipedia.

I hope this gives those who are interested some more to go on. I'll post again when I've got more info.


Nordic Needle and Punto Antico

$
0
0

I used to write the newsletter for my local embroidery group and so I subscribed to many needlework newsletters and messageboards as sources for the latest news and products to report to the membership. Years have past and I no longer write the newsletter but I'm still subscribed to the various needlework newsletters.

Imagine my surprise to open the April 8th Nordic Needle Newsletter and see that the feature article was on Punto Antico and cited my blog and article for Piecework!


It is rather startling to open an email and view your own photo staring back at you.

I'm very glad to see that people are interested in Punto Antico here on this side of the Atlantic, Nordic Needle is a needlework store in the state of North Dakota in the US. In the newsletter they provide links to a designer called Gingerbread Girl who has designed some contemporary patterns for using Punto Antico stitches (follow the links in the newsletter to see them). I couldn't find out anything about Gingerbread Girl so unfortunately I can't tell you about her or her kits.

There is only one thing I wanted to add to what Debi says in the newsletter. While it is true that Punto Antico has become most commonly practised as a counted thread technique, it is also still done as a freestyle technique in Italy.


There is a delightful book called Punto Antico disegnato by Giuseppa Federici which describes how this technique is executed as a freestyle embroidery. The text is only in Italian but the step-by-step colour photos are easy to follow and there are over 50 patterns, motifs and designs - some of which use Cutwork and Reticello designs to compliment the Punto Antico stitches.

You can order this book from Tombolo Disegni, send an email request to order.

If anyone knows anything about Gingerbread Girl designs, will you leave a comment below?


Old Needlework Encyclopedia - Volume II

$
0
0


Thanks to a very generous and kind friend in Italy, I have, at last, the second volume of this old needlework encyclopediaIl Nuovo Libro dei Lavori Femminili, Volume Secondo [The New Book of Woman's Works, Second Volume] by Amelia Brizzi Ramazzotti, Sonzogno, Milan. I believe that it was printed in 1914 though I can't find a date in the book.

I told you about the first volume in this post here. The second volume is full of references to Italian needlework as well as traditional widely known techniques. It has 10 sections: Embroidery on Tulle, Filet Lace, Knitting, Crochet with a subsection on Hairpin Crochet, Macramé, Tatting, Bobbin Lace, Renaissance Lace with subsections on Brussels Lace and Cluny Lace, Tenerife Lace, Needle Lace with subsections on Reticello, geometric Aemilia Ars Lace and Venetian Point Lace including Gros Point.

The last page is an ad for Cartier-Bresson thread which lists the appropriate threads to use for the various techniques and how they are (were!) available, eg. in skeins, balls or spools.

I wanted to show you this idea for Filet Lace using the tape used in Renaissance Lace:


It says that the design must be laid out on paper or fabric and attached to a support for execution much like that of Embroidery on Tulle. First you attach the tape and then go about filling in the leaves and medallions making sure to catch the filet netting below. This is definitely a different approach to Filet Lace!

This is a wonderful knotted fringe from the Macramé section:


Here is the knot in case you feel like figuring it out:


A lovely little volume to study and be inspired by. Text in Italian. There is also a listing at the end of other publications and I spy one on monograms in satin stitch that I'll be searching for...


Pizzo Margarete - Margaretenspitze

$
0
0

For those of you who were intrigued by the Pizzo Margarete or Margaretenspitze knotted lace that I told you about in this post here, Lotte Heinemann has reprinted her book and has some essential parts translated into English (the book text is in German) which are available in an insert along with some graph paper for you to chart your own creations.


As this technique is originally a German one, I thought that maybe those of you who may want to delve further into it would like to know of this book's reprinting. The book is 147 pages and coil bound which is nice for referencing while you are working. The English insert is 7 pages long and highlights the essential information you will need for working the lace.

There are clear, close-up photographs and hand-drawn illustrations:


If you have some experience with Macramé, this will be a valuable volume to add to your collection. For those of you who speak German, I would say this is the bible on this technique.

You can order it from this website, clicking on some of the links produces the option for English text, the book is pictured on the link Literatur und Links. You must request the English insert as it is not automatically included.

Lotte Heinemann tells me she and a friend are working on a beginner's book for this technique to be published in English and German. She will keep me posted and I will pass on any information that I receive.


Aemilia Ars Rose Needle Lace Insert in Piecework

$
0
0


As I hinted a few posts ago, there is an Aemilia Ars needle lace insert in the May/June 2013 issue of Piecework magazine by the Associazione "I Merletti di Antonilla Cantelli".

The project includes step by step photos which had to be rather small in the magazine due to space constrictions but if you have a magnifying glass handy, they are valuable source of reference when executing the lace.

I had a reader write to ask me if the lace was indeed stitched to the size of the pattern in the magazine and the answer is yes! It is an exquisitely delicate little piece:


I had another reader write to ask me for more details on how to execute the "gruppetti" picots which are placed at the intersection of two overcast bars. As I am only a beginner when it comes to executing this lace, I can't pretend that my "gruppetti" are anything to show off but the ladies of the Associazione "I Merletti di Antonilla Cantelli" assure me that practise, much practise improves them. I know that's not a magic answer but it's all I have for you. These ladies have been doing this lace for many, many years to achieve the high level of expertise in their lace, don't be too hard on yourself if yours doesn't look the same, but don't give up either!

If you're fortunate enough to be going to the Italia Invita Forum in Parma in May this year, stop by and see the ladies at their booth, you can catch their latest book or better yet, take their mini-courses!


I hope you enjoy the article in Piecework, somehow the photos never do justice to what is the most amazing piece of needle lace I've ever been close to. 


Ars Aesis and Buratto Sfilato - New Book!

$
0
0


Giuseppa Federici's latest book is out and this time she's got a variety of things to show us! She has created some beautiful embroidery designs using a variety of stitches, some specifically from other Italian needlework techniques and others form traditional embroidery including some fascinating research which has lead her to the embroideries of Portugal.

Ars Aesis embroidery takes the Latin name for Jesi which is the town where Giuseppa Federici calls home in the Marche region of Italy. She wanted to dedicate an embroidery style to her local area and Ars Aesis features motifs of local flowers, crops and trees. Inspiration also comes from the beautiful frescos and interior decorations of the local early 19th century Villa Salvati.

Ideal fabric is listed as homespun, but if you don't have any of that handy, compact linens will work just fine. Threads used for Ars Aesis are crochet threads like DMC Babylo or Anchor Freccia. Using these threads results in lovely textured work.


Step-by-step colour photo sequences show the execution of both the embroidery stitches used and the insertion stitches used to join pieces of fabric together. There are also needle lace stitches for open areas and withdrawn thread stitches for borders, hems and framing. The how-to section is quite extensive and is an impressive 23 pages long including a section on tassels. There are over 30 motif designs.


There is a short section of the book dedicated to Buratto Sfilato (Drawn Thread Work done on contemporary Buratto fabric). A lovely Caterina de' Medici border motif is stitched around an area that is withdrawn with a pattern of a rose executed in linen stitch. While neither the Catherine de'Medici embroidery nor the linen stitch is explained, this is still a very important section. The entire withdrawn area is explained in step-by-step detailed photos showing closeups of both the back and the front of the work. There is also an edge treatment explained and if you want to learn more about Catherine de'Medici embroidery, Giuseppa Federicihas written three books on it.

This book ends with a photo gallery of embroideries and a valuable bibliography to help you in further study. It is 80 pages long and the text is in Italian.

In Europe you can purchase by bank transfer directly from the author herself. Right now I'm sure she is madly getting ready for the Italia Invita Forum in Parma, so give her a few days to answer you. If you're overseas, Tombolo Disegni will be carrying it. She too is getting ready to go to the show in Parma so you may not get a reply to your email right away.

Hemstitching - New Book!

$
0
0


Anna Castagnetti of Ricami a Fili Tesi has been busy! Her latest book is on Hemstitching and is a gold mine of different stitches and edge treatments.


Over 60 pages of closeup step-by-step photos and diagrams make this volume easy to follow even if you don't read Italian.

Edge treatments include:

  • mitred corners (two ways to do it)
  • folded hem (including corner treatment)
  • rolled hem (including corner treatment)
  • buttonholed hem (including corner treatment)
  • buttonholed hem with picots made of bullion knots
  • long and short blanket stitch hem (including corner treatment and a couple of ways to dress up this type of hem)
  • cat's tooth hem (it's like nun's stitch - including corner treatment)
  • looped fringes like those used in Assisi Embroidery
  • folded fringe hem with one variation and including a tasseled corner
  • looped and knotted hemstitch (including corner treatment)
  • flystitch hemstitch
  • round hem with needle lace triangles
  • triple buttonhole arcs with picots
  • embellished fringed hem (including corner treatment)
  • overlapping buttonhole arcs (including corner treatment)
  • bull's head stitch
  • fringe with embellished four-sided stitch
  • joining two pieces of hemmed fabric together with simple hemstitch (including corner treatment)
  • two methods for appliqué borders (including corner treatment and embellishment stitching)
  • method for making your own bias tape and applying it to a hem (including corner treatment)

Anna's good taste and expertise shine though in this volume which, as you can see from the content list above, is very thorough.

You also can see more of Anna's beautiful hemstitching in Mani di Fata's latest hemstitching issue: Punti a Giorno 7.

In Europe Anna's latest book is available directly from the publisher NuovaS1 via money transfer. Overseas, contact Anna (she speaks English) and she'll let you know how to get it.

Puncetto News and a new book!

$
0
0

Second Volume,  2009

There is some good news for those of you who have been waiting for the reprinting of the second volume on Puncetto needle lace– copies are now available!

This is really the book you need if you want to get started with Puncetto needle lace. It has a how-to section which gradually instructs you on more and more complicated patterns as well as many patterns for complete pieces. The second printing has been held up for quite a long time and I'm glad to see that everything got worked out and that it is once again available.

The first volume is more advanced and provides patterns and instructions for using multiple colours in designs which are used in the local traditional costumes of this region found in the north of Italy near the Liechtenstein border.

First Volume,  2006

And now there is a third volume by the ladies of the Scuola di Puncetto Valsesiano which is very advanced featuring many different designs (I counted 70!). You can see some of the pages here. There are even some instructions on how to make the buttons found on traditional costume blouse cuffs!

Third Volume,  2013

I'm thrilled to see the inclusion of the pattern for the blue gentian flower that was part of the display at the 2011 Italia Invita Forum. There are other flowers and plants as well and rounded edges and motifs like this one from the back cover of the book:


I have been privileged to attend a few workshops with these talented ladies and I dream one day to take a "Puncetto Vacation" which the school offers for a week in August.

Tombolo Disegni tells me that they now have all of these volumes in stock.

Trapunto - Silvana Vannini - Part One

$
0
0

I am very pleased to offer you an article that I have translated by Silvana Vannini, an Italian lady who reproduced the Guicciardini Coverlet of Florence. The original coverlet resides in storage at the Bargello Museum in Florence and Signora Vannini's reproduction can be found at the Palazzo Davanzati Museum in Florence.

Signora Vannini has also generously created a Trapunto pincushion project to accompany this article which will be posted separately. To reach more readers, I will also be posting the original article in Italian as quite a number of visits to this blog come from Italy.

Silvana Vannini's reproduction coverlet at the Palazzo Davanzati, Florence.

The Palazzo Davanzati Guicciardini Coverlet Reproduction in Florence, Italy
By Silvana Vannini

The idea of making a copy of the Guicciardini Coverlet was conceived on the occasion of the International Textile Art Exhibition held in Florence, Italy in October of 2006 at the Istituto degli Innocenti [Institute of the Innocents]. The theme of this exhibition invited textile artists to create their own works using the Guicciardini Coverlet for inspiration. At that time, the original Coverlet was being restored by the Opificio delle Pietre Dure[literally: Semi-Precious Stones Workshop. It is a public conservation and restoration institute which also houses archives, a specialist library and a museum of historic pieces of inlaid semi-precious stone artifacts.]. The restoration would be finished in 2010 with an exhibition in Florence at the Palazzo Davanzati where both the original and reproduction coverlets would be exhibited. 

The Guicciardini Coverlet or the Usella Coverlet (so called for the name of the area in which it was found) is one of a few amazing works of trapunto surviving from the end of the 14th century. The subject of the coverlet is the legend of “Tristan and Isolde” and it was made in a Sicilian workshop as is evidenced by the Sicilian dialect stitched along the bottom of the coverlet. The coverlet belonged to Count Ferdinando Guicciardini (1845 - 1906) and his wife, the Countess Maddalena Niccolini Guicciardini (1847 - 1916), and was found in their villa in the Tuscan municipality of Usella (about 50 kms north of Florence) in 1890. It was exhibited for a long time at the privilege of the Guicciardini family before being sold for 90,000 Lire (almost $94,000 USD in today’s market) in 1927 to the Bargello National Museum in Florence. 

There was another coverlet, also owned by the Guicciardini family, a twin to this one that was sold to the “Kensington Museum of London” (now the Victoria and Albert Museum) in 1904, commonly known as the Tristan Quilt

These great tapestries were often hung on the walls with the function of dividing large spaces or it is thought that they may have been used as bed curtains.

The 2006 exhibition created the exciting and significant opportunity to enter into relations with the restorers of the original Coverlet which was the spark for making this work so special.

The collaboration with the Opificio delle Pietre Dure allowed access to very detailed information about the origins of the original work. 

Held up against the light, the padding is evidenced.

The photographic documentation made it possible for the artist Marisa Sardini Silvestri to create freehand drawings in the original dimensions which were then traced on to the linen fabric used for the realization of the reproduction.

The research undertaken by the Opificio has determined that the original fabric used was linen, both for the top sheets and those underneath. The linen used for the top sheets has a more dense weave compared to that used underneath. The threads used for the embroidery were a brown-coloured linen for the figures and flowers, while the quilting of the background was done with a linen thread the same colour as the fabric.

The stuffing is cotton wool for the bigger figures while a few of the details of the decorations on the clothing and the horse trappings were stuffed with a slightly twisted cotton thread to give greater emphasis on details and more three-dimensionality.

The philological path undertaken to achieve a faithful reproduction of the Guicciardini Coverlet meant building the copy with the same criterion as the original. 

To begin the work meant the quest for materials as similar as possible to those of the original. The careful study had to be made of the original’s technical details such as joining three sheets of 70 cm wide linen together at various stages of the work for each side; observing the simple but effective decoration of the stitches; giving attention to facial expressions and trying to understand how the figures were padded in order to create the same relief effect were the starting points of the project. Given the particularities of the design, it was necessary to prepare the padding of the figures and horses before applying and affixing the backing fabric. 

At this point the stitching of the outlines of all the design elements in backstitch using linen thread was started as was done on the original. The letters and the small designs were then padded from the back side of the work by parting the ground fabric threads and inserting the cotton for the padding (cotton wool). The use of cotton wool did not make the coverlet overly heavy, in fact, its weight is about 3.6 kg, the same as the original.  The quilting of the background was done in running stitches and it was necessary for the duration of the entire process to check the photographs of the original for the inclination of the original quilting in order to create the effect of light and shadow. This represented the only significant technical difficulty in the working of the entire project because the inclination of the quilting tends to give a particular balance to the ground threads of the fabric which is especially noticeable when it is exhibited vertically.

A specially designed 2 metre wide frame was made for working this project which was set on sawhorses. The finished dimensions of the work were 2.46 m high by 2.05 m wide. Three sheets of Italian Bellora linen fabric were used per side. The time required for the completion of the work was about 3,600 hours, the amount of thread for the background quilting done in running stitch was about 1.44 metres while for the embroidery of the figures about 3.192 metres of thread were necessary. DMC linen embroidery floss was used. Total cost of materials was approximately 500 euros (just under $700 USD). This data can help in understanding the level of importance that the realization of this project had in my life, an importance which was born the moment that the needle and thread became my brush/pencil/burin. In the figurative description of the story, the expressions, the emotions, the scenes took shape in my hands and mind, I heard the lapping of waves against the ships, the neighing of the horses, the sounds of the trumpets, the clamour of the crowd, and this caused the emotional turmoil that filled the years of work to create an unrepeatable experience.

Silvana Vannini's reproduction coverlet.
About the author:
Silvana Vannini lives in the Tuscan countryside. Now retired, she worked as an instructor of Technical Applications, which in Italy meant, tailoring, sewing, knitting, embroidery, drawn thread work and related activities. Her personal studies in Art History led her to create works of embroidery and painting. 20 years ago she discovered quilting and the perfect medium for expressing herself. She makes small works using many varied techniques like embroidery, appliqué, Florentine Trapunto and others which she also teaches at a few Museums and Foundations. In 2011 she participated in a competition with the theme: The Bag - Necessary Accessory. This led to her selection to participate in the exhibitions which were held for the first time in Florence in Via Toscanella it what was the former studio of the Florentine painter Ottone Rosai (1895-1957), and then in Antwerp, Belgium at the Royal Academy of Fine Arts. She has donated her reproduction of the Guicciardini Coverlet to the Palazzo Davanzati and is presently working on projects for future exhibitions.

Further reading:
Arthurian Archives VIII. Italian Literature I. Tristano Panciatichiano edited and translated by Gloria Allaire, D.S. Brewer, Cambridge, England, 2002.
Intorno a due antiche coperte con figurazioni tratte dalle Storie di Tristano[Around two antique coverlets with figures from the Stories of Tristan]. Pio Rajna. In the philology journal: “Romania”, XLII, pgs. 517-579, Librairie Ancienne Honoré Champion Éditeur, Paris, France, October, 1913.
La “coperta” Guicciardini. Il restauro delle imprese di Tristano[The Guicciardini Coverlet. The restoration of the deeds of Tristan]. Edited by Rosanna Caterina Proto Pisani, Marco Ciatti, Susanna Conti, Maria Grazia Vaccari. Edifir Edizioni, Florence, Italy, 2010. There is now an English language edition available.
Un Trapunto Trecentesco [A Fourteenth-Century Quilt]. Lidia Morelli. In the Italian art magazine “Dedalo. Rassegna d’Arte”, Anno II, Volume III, pgs. 770-783, Casa Editrice D’Arte Bestetti e Tumminelli, Milan-Rome, Italy, 1921-22.

On the web:
There is a hidden section on the Bargello National Museum’s website where you can view good close up photos of the original coverlet before the restoration and read details about the restoration process (text in Italian).

The Italian needlework magazine photographer Miky Dessein has posted a video of the interior of the Palazzzo Davanzati during the period of the 2010 exhibition of both the restored Guicciardini Coverlet and the reproduction on YouTube.

Trapunto - Silvana Vannini - Versione Italiana

$
0
0

Read the English version of this post:

la copia al Palazzo Davanzati, Firenze

La copia di Palazzo Davanzati a Firenze
Silvana Vannini

L’idea di realizzare una copia della “Coperta Guicciardini” nasce in occasione della Mostra Internazionale di Arte tessile tenutasi a Firenze nell’ottobre del 2006 presso l’Istituto degli Innocenti. Il tema della mostra invitava le artiste tessili ad ispirarsi proprio alla coperta Guicciardini per la realizzazione delle loro opere. In quel periodo la coperta originale era oggetto di restauro da parte dell’Opificio delle Pietre Dure, restauro che è terminato nel 2010 con una mostra a Firenze, presso Palazzo Davanzati, nella quale sono state esposte entrambe le coperte. 

La "Coperta Guicciardini o di Usella" è uno dei pochi meravigliosi lavori in "trapunto" giunti sino a noi, dalla fine del XIV secolo. Il soggetto della coperta narra la storia di "Tristano e Isotta" ed è stata realizzata in un laboratorio siciliano come testimoniano le scritte in dialetto siciliano che compaiono sul fondo della coperta.  La coperta apparteneva al conte Ferdinando Guicciardini e sua moglie, la contessa Maddalena, la ritrovò nella loro villa di Usella nel 1890. È stata esposta per molto tempo ad appannaggio della famiglia Guicciardini per essere  poi venduta nel 1927 al Museo Nazionale del Bargello. Esiste un'altra coperta appartenuta alla famiglia Guicciardini, gemella di questa, che fu venduta al "Kensington Museum"di Londra", l'attuale Victoria and Albert Museum. Questi grandi arazzi spesso venivano appesi alla pareti con la funzione di dividere grandi spazi oppure si pensa che siano stati usati come cortine intorno ai letti.

La mostra del 2006 ha creato l’occasione, unica per emozione ed importanza, di entrare in relazione con i restauratori della coperta originale, che ha fatto scoccare la scintilla per la realizzazione di quest’opera così particolare.

La collaborazione con l’Opificio delle Pietre Dure ha permesso di accedere ad informazioni molto dettagliate sull’opera originale. 

la copia

La documentazione fotografica ha reso possibile all’artista Marisa Sardini Silvestri di realizzare a mano libera il disegno in misura originale che è stato poi riportato “in trasparenza” sul tessuto di lino utilizzato per la realizzazione della copia.

Le ricerche svolte dall’Opificio hanno determinato che il tessuto utilizzato in origine, era in lino, sia per i teli della parte superiore che per quelli della parte inferiore. Il lino utilizzato per i teli superiori ha una trama più fitta rispetto a quelli dei teli inferiori. I filati utilizzati per il ricamo sono di lino marrone per la decorazione delle figure e dei fiori, mentre il trapunto del fondo è stato realizzato con un filato di lino dello stesso colore del tessuto.

controluce

Le imbottiture sono di cotone a fiocchi nelle figure più grandi mentre alcuni dettagli delle decorazioni degli abiti e dei finimenti dei cavalli, sono stati imbottiti con un filo di cotone poco ritorto per dare maggiore evidenza ai particolari e maggiore tridimensionalità.

Il percorso filologico intrapreso per realizzare la riproduzione fedele della coperta Guicciardini ha significato costruire la copia con lo stesso criterio dell’originale.

L’inizio del lavoro ha riguardato la ricerca dei materiali più simili possibile a quelli dell’originale. 
Lo studio accurato dell’originale nelle particolarità tecniche, quali quella di avere teli di lino larghi 70 cm uniti tra di loro in momenti diversi della lavorazione, l’osservazione del punto, semplice ma di grande effetto decorativo, l’attenzione per ridare espressività ai volti e per cercare di capire in quale modo erano state imbottite le figure per poter ripetere lo stesso effetto di rilievo, sono stati il punto di partenza del lavoro.

dettaglio del lavoro

Per la realizzazione, data la particolarità del disegno, è stato necessario preparare le imbottiture delle figure e dei cavalli prima di applicare e fermare il telo posteriore.

A questo punto è iniziato il lavoro di cucito con filo di lino, dei contorni di tutti gli elementi del disegno a punto indietro come nell’originale. Le lettere e i piccoli disegni sono stati imbottiti successivamente dal rovescio del lavoro, provvedendo ad allargare la trama del tessuto e inserendo il cotone per l’imbottitura (bambagia di cotone). L’uso della bambagia non ha fatto appesantire eccessivamente la coperta, infatti il suo peso è di circa 3,6 Kg così come l’originale. Il trapunto del fondo è stato realizzato a punto filza e per tutta la lavorazione è stato necessario verificare dalle fotografie l’inclinazione del trapunto originale in modo da creare un effetto di luci ed ombre. Questo ha rappresentato l’unica difficoltà tecnica significativa nella lavorazione dell’intera opera perché l’inclinazione del trapunto tende a dare un equilibrio particolare alla trama del tessuto, che si nota soprattutto se esposto in verticale.

Per l’esecuzione è stato utilizzato un telaio appositamente realizzato della larghezza di due metri appoggiato su cavalletti. Il tempo necessario alla ultimazione dell’opera è stato di circa 3.600 ore di lavoro, la quantità di filo per il punto filza del fondo è di circa 1.440 metri, mentre per il ricamo delle figure sono stati necessari circa 3.192 metri. Questi dati possono far capire l’importanza che ha avuto nella mia vita la realizzazione di questa opera che è nata nel momento in cui l’ago e il filo sono diventati pennello, matita, bulino. Nella descrizione figurata della storia, delle espressioni, delle emozioni  l’affresco ha preso corpo nelle mie mani e nella mia testa, ho udito lo sciabordio delle navi, i nitriti dei cavalli, il suono delle trombe, le voci, il clamore della folla, e questo ha provocato il tumulto emotivo che ha riempito gli anni di lavoro per una esperienza irripetibile.

----------

Per vedere altre foto, la bibliografia e altre informazioni, vedete la versione inglese prima parte e seconda parte

C'è anche un progetto di ricamo di Silvana Vannini che sta su altre pagine: prima parte e seconda parte.


Trapunto - Silvana Vannini - Part Two

$
0
0

I am very pleased to offer you an article that I have translated by Silvana Vannini, an Italian lady who reproduced the Guicciardini Coverlet of Florence. The original coverlet resides in storage at the Bargello Museum in Florence and Signora Vannini's reproduction can be found at the Palazzo Davanzati Museum in Florence.

Signora Vannini has also generously created a Trapunto pincushion project to accompany this article which will be posted separately. To reach more readers, I will also be posting the original article in Italian as quite a number of visits to this blog come from Italy.

Other parts of this series of posts can be found here: 

The Guicciardini Coverlet consists of six scenes which describe episodes from the legends of Tristan and Isolde with stitched captions in Sicilian dialect. The piece is thought to have been cut down from it’s original size as there are parts missing from the style of layout which is similar to the more complete piece in London. The Tristan Quilt in London, the larger of the two coverlets, has 14 depictions which occur later in the story. 

Embroidery by Silvana Vannini, designs by Marisa Sardini Silvestri.

Along the left border of the Guicciardini Coverlet are three scenes of Tristan’s arrival at the court of King Mark. The stitched comments for the first scene translate as: How the messenger came to Tristanthe second scene reads: How Tristan and Gorvenal left the court of King Pharamond; the third scene: How Tristan and Gorvenal came before King Mark. The fourth scene is along the bottom and is described: How King Mark invests Tristan

Embroidery by Silvana Vannini, designs by Marisa Sardini Silvestri.

The next four depictions are really two scenes and are framed by borders of four-leafed clover. These two-part scenes depict the departures of both Tristan and Morholt for the islet of St. Samson’s (How Tristan goes to the islet to go to battle and How Morholt went to the islet

Embroidery by Silvana Vannini, designs by Marisa Sardini Silvestri.

and the relative duel between Tristan and the Morholt (How Morholt battles Tristan on horseback and How Tristan battles Morholt and the lance breaks). 

Embroidery by Silvana Vannini, designs by Marisa Sardini Silvestri.

Tristan’s armour and shield bear the Guicciardini coat of arms of three hunting horns. 

Embroidery by Silvana Vannini, designs by Marisa Sardini Silvestri.

Today the reproduction quilt is displayed on a four-post bed in the Camera dei Pavoni [Peacock Bedroom] of the Palazzo Davanzati Museum at no. 13 Via Porta Rossa, Florence, Italy where the original coverlet was displayed from 1956 - 1991. 

The Palazzo Davanzati is a mid-14th century house built by the Davizzi Family and owned  by the Davanzati Family from 1578 - 1838. In 1904 it was purchased by antiquarian Elia Volpi (1838 - 1958) who reopened the Palazzo as a museum in 1910. Purchased by the State in 1951, the Palazzo was reorganized and reopened in 1956 at which time the Guicciardini Coverlet was displayed on loan from the Bargello Museum. The Palazzo Davanzati was closed in 1995 for major restorations and has now been partially reopened with restoration work continuing on the upper floors. There is a large 16th - 19th century lace and embroidery collection on display on the 1st floor that is not to be missed.

The original restored Guicciardini Coverlet is presently kept in a controlled storage environment at the Bargello National Museum at no. 4 Via del Proconsolo, about six blocks away from the Palazzo Davanzati in Florence, Italy and is not on display to the public. 

Although there is a hypothesis that the Guicciardini Coverlet, the Tristan Quilt and a third work of Trapunto which is privately owned were wedding gifts presented in 1395 to Piero di Luigi Guicciardini and Laudamia Acciaiuoli, there are no surviving documents to support this. 

There are many different versions of the story of Tristan and Isolde, dating back to perhaps the late 8th century and the Scottish Highlands. Over the centuries different European countries have added and subtracted to the tales making them relevant to their own peoples. The stories have inspired many artists and scenes from various tales are represented in a wide range of art mediums. On the Guicciardini Coverlet, we find King Pharamond of Gaul or Ferramonte as he was in late 13th century Tuscan prose. We find mention of him in 13th and 14th century Tuscan versions. The Guicciardini Coverlet seems to be freely made up of scenes from a criss-cross of many tales probably well know by the populace at the time.

Trapunto - Silvana Vannini - Part One

Trapunto - Silvana Vannini - Part Three


There is a Trapunto project to accompany this article: Project part one and part two.

To read the Italian version of this article click here.

About the author:
Silvana Vannini lives in the Tuscan countryside. Now retired, she worked as an instructor of Technical Applications, which in Italy meant, tailoring, sewing, knitting, embroidery, drawn thread work and related activities. Her personal studies in Art History led her to create works of embroidery and painting. 20 years ago she discovered quilting and the perfect medium for expressing herself. She makes small works using many varied techniques like embroidery, appliqué, Florentine Trapunto and others which she also teaches at a few Museums and Foundations. In 2011 she participated in a competition with the theme: The Bag - Necessary Accessory. This led to her selection to participate in the exhibitions which were held for the first time in Florence in Via Toscanella it what was the former studio of the Florentine painter Ottone Rosai (1895-1957), and then in Antwerp, Belgium at the Royal Academy of Fine Arts. She has donated her reproduction of the Guicciardini Coverlet to the Palazzo Davanzati and is presently working on projects for future exhibitions.

Further reading:
Arthurian Archives VIII. Italian Literature I. Tristano Panciatichiano edited and translated by Gloria Allaire, D.S. Brewer, Cambridge, England, 2002.
Intorno a due antiche coperte con figurazioni tratte dalle Storie di Tristano [Around two antique coverlets with figures from the Stories of Tristan]. Pio Rajna. In the philology journal: “Romania”, XLII, pgs. 517-579, Librairie Ancienne Honoré Champion Éditeur, Paris, France, October, 1913.
La “coperta” Guicciardini. Il restauro delle imprese di Tristano [The Guicciardini Coverlet. The restoration of the deeds of Tristan]. Edited by Rosanna Caterina Proto Pisani, Marco Ciatti, Susanna Conti, Maria Grazia Vaccari. Edifir Edizioni, Florence, Italy, 2010. There is now an English language edition available.
Un Trapunto Trecentesco [A Fourteenth-Century Quilt]. Lidia Morelli. In the Italian art magazine “Dedalo. Rassegna d’Arte”, Anno II, Volume III, pgs. 770-783, Casa Editrice D’Arte Bestetti e Tumminelli, Milan-Rome, Italy, 1921-22.

On the web:
There is a hidden section on the Bargello National Museum’s website where you can view good close up photos of the original coverlet before the restoration and read details about the restoration process (text in Italian).

The Italian needlework magazine photographer Miky Dessein has posted a video of the interior of the Palazzzo Davanzati during the period of the 2010 exhibition of both the restored Guicciardini Coverlet and the reproduction on YouTube.

Trapunto - Silvana Vannini - Part Three

$
0
0

This is the third part of a series written by Silvana Vannini of Italy and translated into English by myself.

Trapunto - Silvana Vannini - Part One
Trapunto - Silvana Vannini - Part Two
Trapunto - Silvana Vannini - Part Four


Trapunto Heart Pincushion Project
by Silvana Vannini

Aside from the charm and romance of the scenes from the legend of Tristan, the Guicciardini Coverlet is also intriguing for the variety of designs on it: four-leaf clovers, grapevines, flowers, foliage, animals, human figures, armour, weapons, naval vessels, architecture, musical instruments, clothing and more, all of which give clues to dating the work and to the political climate at the time it was made. The imperfect hand-drawn designs give a rustic feel to the work and aid in the fascination which draws you in to take a longer look. We present this little heart pincushion with the shields of Tristan bearing the three hunting horns – emblem of the Guicciardini family – and that of Morholt bearing the fleur-de-lys.

Pincushion finished size: 15 cm x 15 cm

Materials:
  • 40ct 100% Bellora ivory-coloured linen 21.5 cm x 21.5 cm for the embroidered piece; 12 cm x 14 cm for the square back piece; 12 cm x 4 cm for the button flap; 2 pieces 12 cm x 12 cm for the stuffed cushion
  • 100% Bellora ivory-coloured linen gauze 10 cm x 10 cm
  • Quilting needle no. 10
  • Tapestry needle no. 18
  • Long Trapunto Needle (optional)
  • Basting thread
  • DMC Linen Floss, colours: L779 Sepia, L822 Beige
  • 100% Cotton yarn, colour: natural or ivory (Cotone Povero)
  • 100% Cotton quilt batting
  • Two buttons 
  • Awl
  • Embroidery hoop
  • Pins
  • Scissors
  • Thimble
  • Water soluble fabric marker


Stitches used in this project:

A note about linen floss: in the interests of authenticity the reproduction quilt was made using DMC linen floss which is difficult to use. It must be cut in short lengths as it tends to unravel. Feel free to substitute DMC cotton floss for easier execution of the embroidery.

Execution:
Use your basting thread to mark the horizontal and vertical centres of your fabric.


Withdraw one fabric ground thread on all four sides of an area 21.5 cm x 21.5 cm on the 40ct linen. Centred inside this area, withdraw one ground thread on all four sides of an area 10 cm x 10 cm leaving a tail at each corner long enough to thread into a needle. Cut out the 21.5 cm x 21.5 cm area along the withdrawn thread channel. Fold over a 1 cm hem to the back side on all edges and baste. Fold the tips of the corners in so that the tips line up to the corners of the withdrawn thread 10 cm x 10 cm area, baste close to the fold. Trim corner seams to 1 cm. Press.


Inside the 10 cm by 10 cm area, centre and trace the design with the water soluble fabric marker. 

Pattern should measure approx. 3.5" x 3.5"

On the back of the fabric pin a 10 cm x 10 cm piece of the linen gauze and baste the two fabrics together. 


Mount your fabric on the straight of the grain into an embroidery hoop making sure to have a taut surface to work on. 


Backstitch all design lines except the heart shape using the embroidery needle and 2 strands of the brown linen floss. Begin and end your thread lengths with a knot on the back of the fabric. Stitch through both layers of fabric. Backstitch the heart outlines in 2 strands of the ecru linen floss. 


Turn the work over and with an awl gently open up the ground fabric threads of the linen gauze and stuff the fleur-de-lys on the shield with the cotton quilt batting. With the tapestry needle gently reposition the ground fabric threads to close the openings you have made. For the hunting horns, use the tapestry needle or a long trapunto needle and a length of the cotton yarn to fill the narrow strips and outlines around the larger ends of the hunting horns. Pass the yarn around the shield outlines and outline of the heart shape. 


When filling with the yarn, choose an angle which will allow you to fill the entire shape with parallel lines. Enter the fabric at the side of the shape just under the backstitches, pull the yarn through leaving the tails a bit outside the entry point and exit out the other side of the shape again, just under the backstitches. Trim the ends but leave tails so you can reposition the yarn if you need to. Begin the next row of yarn filling parallel to the first row and repeat as many times as necessary to fill the shape. Do not overfill. After filling the entire shape, trim all the yarn close to the fabric and work the ground fabric threads closed.  Trim away the excess linen gauze on the back of the work about 1 cm from the heart shape. 


Remove the work from the hoop. With 1 strand of the ecru linen floss and the embroidery needle execute tiny running stitches in evenly spaced diagonal rows on the inner empty parts of the shields. Make the running stitches on the right side of the work very small while the stitches on the back side can be much longer.


About the author:
Silvana Vannini lives in the Tuscan countryside. Now retired, she worked as an instructor of Technical Applications, which in Italy meant, tailoring, sewing, knitting, embroidery, drawn thread work and related activities. Her personal studies in Art History led her to create works of embroidery and painting. 20 years ago she discovered quilting and the perfect medium for expressing herself. She makes small works using many varied techniques like embroidery, appliqué, Florentine Trapunto and others which she also teaches at a few Museums and Foundations. In 2011 she participated in a competition with the theme: The Bag - Necessary Accessory. This led to her selection to participate in the exhibitions which were held for the first time in Florence in Via Toscanella it what was the former studio of the Florentine painter Ottone Rosai (1895-1957), and then in Antwerp, Belgium at the Royal Academy of Fine Arts. She has donated her reproduction of the Guicciardini Coverlet to the Palazzo Davanzati and is presently working on projects for future exhibitions.

Trapunto - Silvana Vannini - Part Four

$
0
0

This is the fourth (and final) part of a series written by Silvana Vannini of Italy and translated into English by myself.

Trapunto - Silvana Vannini - Part One
Trapunto - Silvana Vannini - Part Two
Trapunto - Silvana Vannini - Part Three (project part one)

Trapunto - Silvana Vannini - Italian Version


Trapunto Heart Pincushion Project
by Silvana Vannini

This is the second part of Silvana Vannini's Trapunto project. For materials, the pattern and stitching instructions, please see the project first part.

This second and final part of the instructions for the project will cover the finishing.

------------------------------


Finishing:

Pillow Flange: Fold in from the edge to match up with the withdrawn thread outline around the centre part with the Trapunto and baste. Whipstitch the corner seams closed. Execute the simple hemstitch to secure the flange and remove basting threads. 


Button flap: Sew the two pieces together with a seam allowance of 1 cm, leaving an opening of about 2.5 cm on one of the long sides in order to turn the piece right-side out. Turn right-side-out, using an awl into the corners if necessary to make a small rectangular piece which should measure 10 cm by 2 cm. Whipstitch the hole closed. Attach the two buttons. Attach the button flap to the embroidered piece on three sides with the simple hemstitch. 


Square back piece: On one edge of the square, measure down 5 cm in from the edge and remove one ground fabric thread, leaving the ends free at 1 cm in from either edge to be buried later inside the pincushion. Fold the edge in on all four sides 1 cm and baste. Fold over the side with the withdrawn thread to line the edge up with the withdrawn thread, baste. Using the simple hemstitch, attach the 2 cm hem at the withdrawn thread. Press. Remove basting thread. Line up this piece with the button flap on the embroidered piece and double check that the buttonhole positions line up with the buttons. Create buttonholes using the tailored buttonhole stitch and carefully cut the centres. Using the simple hemstitch, attach this piece to the edge of the hemstitching of the embroidered piece on three sides, the edge with the buttonholes lines up with the button flap.


Stuffed cushion: Sew the two pieces together with a seam allowance of 1 cm, leaving an opening of about 2.5 cm on one side. Turn right-side-out, using an awl into the corners if necessary to make a small square cushion. Press. Insert cotton quilt batting into cushion and whipstitch the opening closed. Place inside the embroidered pincushion and use the buttons to close the back.

I hope you have enjoyed this series on Trapunto and the Guicciardini Coverlet by Silvana Vannini, don't forget to pop in and see her reproduction Trapunto coverlet at the Palazzo Davanzati when you are in Florence

My deepest thanks to Signora Vannini for sharing this incredible experience with us!

About the author:
Silvana Vannini lives in the Tuscan countryside. Now retired, she worked as an instructor of Technical Applications, which in Italy meant, tailoring, sewing, knitting, embroidery, drawn thread work and related activities. Her personal studies in Art History led her to create works of embroidery and painting. 20 years ago she discovered quilting and the perfect medium for expressing herself. She makes small works using many varied techniques like embroidery, appliqué, Florentine Trapunto and others which she also teaches at a few Museums and Foundations. In 2011 she participated in a competition with the theme: The Bag - Necessary Accessory. This led to her selection to participate in the exhibitions which were held for the first time in Florence in Via Toscanella it what was the former studio of the Florentine painter Ottone Rosai (1895-1957), and then in Antwerp, Belgium at the Royal Academy of Fine Arts. She has donated her reproduction of the Guicciardini Coverlet to the Palazzo Davanzati and is presently working on projects for future exhibitions.

Needle lace lady - Punto Maglie New Book

$
0
0


Two of the most characteristic motifs in Punto Maglie needle lace are the delightful human figures. The male figure is called the Pupo and the female, Pupa.

For their first book, the Associazione Punto Maglie has chosen to introduce us to the Pupa– a lovely little needle lace lady in a dress with a decorated hemline and three little buttons made of bullion knots down the bodice.

This slim, hardcover volume has 30 or so pages which are packed with step-by-step photos - each area of the design is broken down and gone over. Who would have thought that you'd build your Pupa upside-down?

Instructions include the materials needed, where to place your support stitches which help you to execute the needle lace, the various needle lace stitches used, the order of the work and pages and pages of photos.

Text is in Italian but if you have a little experience with needle lace you should do fine. The finished project is a 1.75 inch by 1.75 inch insert.


I look forward to those long summer days filled with sunshine to try my hand at this lovely little lady!

The book can be purchased directly from the Associazione Punto Maglie.

Catherine de'Medici Embroidery - New book and some experiments

$
0
0


A couple of months ago this new book by Rosalba Pepi came out on Catherine de'Medici Embroidery. I have just recently gotten my hands on a copy of this over 120 page volume. I've told you a bit about Catherine de'Medici Embroidery in a few previous posts so you already know that it's a technique that I admire. I've written a bit about Rosalba Pepi of the Laboratorio Tessile di Alice in Castiglion Fiorentino, in the province of Arezzo in previous posts as well. She is also someone that I admire.

Rosalba has a very creative mind when it comes to textiles and has taken ancient traditional techniques like Trapunto and Catherine de' Medici Embroidery and made them delightfully contemporary: see one of her kits here and one of her books here. She was a part of the publication of this essential book on Tassels too.

Rosalba loves to work in breathtaking silk threads dyed with natural materials. Make yourself a cuppa and explore the website of the Laboratorio Tessile di Alice which has Italian and English language versions - you will be delighted by Rosalba's works.

Back to this book: The first section is a few pages on the history of the running stitch with photos of contemporary and early 20th century Catherine de'Medici Embroidery works among other things and a bit about the history of traditional materials used, colours and ideas for application of this technique. (Text in Italian) There follows an instructional section with clear diagrams for executing different pattern lines and starting and finishing working threads. There are some ideas and instructions for edge finishings and tassels too - as well as the care and maintenance of stitched pieces and the tools required for executing the work. The remaining 3/4 of the book is choc-full of over 75 charted patterns and motifs and colour photos of finished works.

There are no precise project instructions but that didn't stop me from deciding on a table runner project anyway. Inspired by Rosalba's use of indigo-dyed silk yarn, I ran off yesterday to my local knitting shop with a ball of Cotone Povero - the traditional cotton yarn used in Catherine de'Medici Embroidery and a piece of undyed modern Buratto linen fabric from Sotema. I found a 17%silk/83%cotton blend of yarn called Night Sea from Misti Alpaca which is slightly thicker than the Cotone Povero yarn but will work nicely all the same. Last night I stitched a bit of a sample border on a scrap of undyed Buratto.

Can you find my stitching error?

Worried about the colour running, I soaked the embroidery in cold water (the label says it's to be washed at 30 degrees) and Marsiglia (Marseille) soap for about an hour. The water was a bit blue but I can't detect any bleed marks on the fabric, at least it doesn't show up so much that it catches the eye. However when I ironed it dry face-down on a white towel, it left some blue on the towel. The hank of yarn is now soaking in a tub of soap and water and I'll be rinsing it until no more blue comes out.

In the meantime, I decided to try one of the tassels from the book using the traditional Cotone Povero yarn.

This is the first of two legs that will be tied together to make the tassel:


This tassel is made of knots on top of knots. I'm going to photograph the process of the second leg so I'll save that for a future post.

In Europe you can purchase this book directly from NuovaS1 the publisher via bank transfer. To pay with PayPal, check out Tombolo Disegni, click on "Libri/Books", then "Libri Ricamo", then "Assisi, Caterina de Medici, Ricamo a Treccia e Nappine" - its about halfway down the page. Send an email to order.


Triple Knotted Tassel

$
0
0

As mentioned in this post, I decided to try to make a tassel from Rosalba Pepi's latest book on Catherine de'Medici Embroidery. Now I'm not going to give away her instructions but I just want to show you another way to achieve knotted tassels which we've discussed before.

So, I've cut a 4m length of 100% cotton Cotone Povero yarn to make the second leg of this tassel. I tied a knot at each end because after all the knotting, the ends tend to become quite unravelled and messy and you lose a lot of your length. Sometimes all you need is just another inch and if it's unravelled and destroyed it can be frustrating. Let's call this long thread the main body thread just because it may become confusing later as to what I'm referring to.

First leg of the tassel completed.
The reason that the main body thread has to be so long is that all those knots upon knots consume a lot of yarn. By the way, kitchen string works nicely if you want to try this method out before investing in some yarn.

Since this tassel requires two legs be made out of the main body thread, I measure out to the half way point (marking it for now with a paper clip) and start a little to the right of it. The centre of the main body thread will, after being folded in half, be where we'll need to attach the "handle" of the tassel so I need to leave a little space for that.

Let me note here that there are no detailed step-by-step instructions in Rosalba's book, so I'm stumbling along on my own. I'm sure there is probably a better way to do this, and it could also be that I'm doing it totally wrong. In other words this is not the authoritative guide to this technique!

The first thing we need to do is make a series of big knots for what will form the head of the tassel.

I made four knots side-by-side


and then made them all into one knot (let's call it a doubled knot).


The end result didn't seem big enough to me so I then made another three more doubled knots


and tied all four into one tripled knot.


Of course you can go on and on and achieve even bigger knots this way but I stopped here. The resulting tripled knot is an interesting little uneven blob.

On I merrily went attaching other lengths of thread with tripled knots by piercing through the main body thread, making doubled knots on either side of groupings of small knotted lengths like I made here which are attached by threading them on to the main body thread like beads.

The only thing to note was that I ended off the completed side of the main body thread with a tripled knot and didn't tie another knot on the main body thread to secure it so in no time at all while I was working on the other side, it came undone!

Of course I had already trimmed the main body thread and therefore I didn't have enough length to re-tie the ending triple knot again, nor to secure it with another single knot.

Argh!

Long about this time the tripled knots that I'd made on short lengths of thread and attached by piercing the main body thread also came undone as they didn't have a knot at the end of their lengths to secure them either.

Double argh!!

I went back and checked out the first leg that I had completed previously (first photo above) and sure enough all the triple knots at the end of all their lengths came undone easily.

Triple argh!!!

At this point I must confess I threw the whole thing in the stitching garbage can which contains thread and fabric and paper only. Muttering to myself I went off in frustration to do something else.

Later, with a cooler head, I dug it out and cut off the parts that had undone. I attached new lengths of thread with a weaver's knot to the main body thread and remade the missing parts. As this is all constructed of knots over knots, no one will ever see where I attached new lengths of yarn!


Here it is, I could have left more space between the head and the first part of the skirt and the head itself is quite irregular (Rosalba's is so much better!). All in all, I like it, I would make another one. What do you think?


Viewing all 99 articles
Browse latest View live


Latest Images